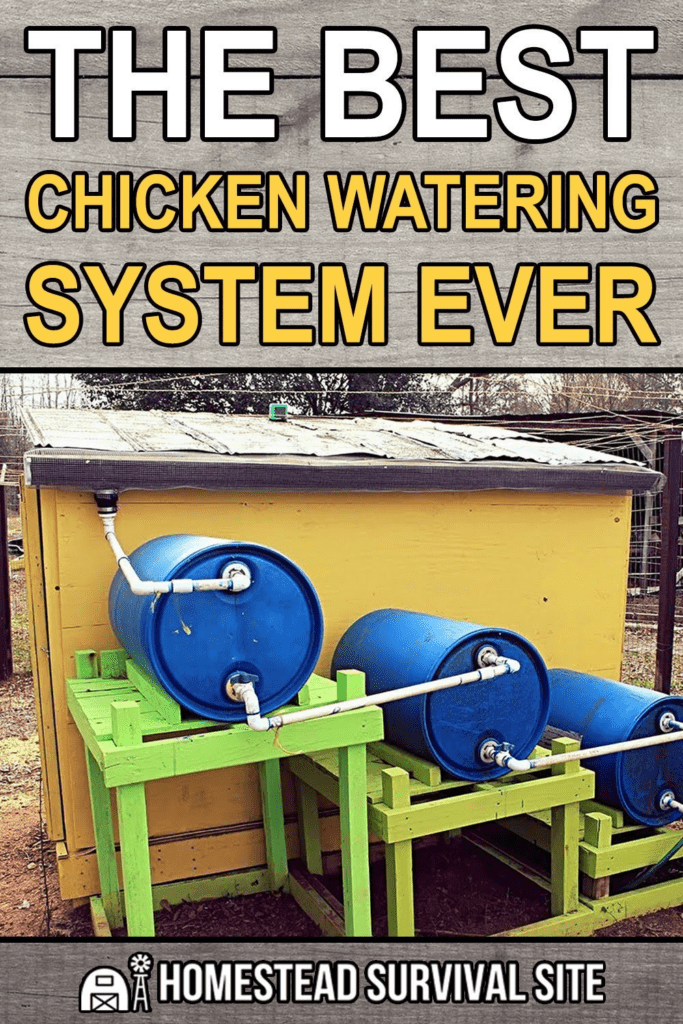
Rain Barrel Set-Up

Supplies You’ll Need (Chicken-Safe Materials)

Guttering System:

  • PVC or aluminum gutters (avoid lead-based materials or any painted/coated materials that may contain toxins)
  • Downspout (PVC or aluminum)
  • Gutter hangers or brackets (to attach the gutter to the coop)
  • End caps (to close off the gutter ends)
  • Leaf guard or mesh screen (to keep leaves and debris out)

Rainwater Collection & Filtration:

  • Food-grade rain barrel (55-gallon or more, BPA-free plastic or stainless steel)
  • Downspout diverter (optional but helps direct water to the barrel)
  • First-flush diverter (removes initial dirty runoff before filling the barrel)
  • Screen filter (fine mesh to prevent debris, insects, and algae)
  • Spigot & overflow hose (to control water output and prevent overflow)
  • Non-toxic sealant (for leak-proofing)

Water Distribution System:

  • PVC pipes or food-grade hoses (to move water from the barrel to the chicken waterers)
  • Gravity-fed chicken waterer or poultry nipples/cups (to provide clean, fresh water)
  • Drip irrigation line (if you want a slow-feed system)
  • Blackout cover for the rain barrel (to prevent algae growth)

How to Rig It Up

  1. Install Gutters on the Coop Roof
    • Attach the gutters along the roof edge using brackets.
    • Ensure a slight slope toward the downspout (about 1/4 inch per foot for proper drainage).
    • Secure end caps to prevent leaks.
  2. Connect Downspout to the Rain Barrel
    • Position the barrel near the downspout on a raised, level surface (cinder blocks or a wooden platform).
    • Attach the downspout diverter to direct rainwater into the barrel.
    • Install a first-flush diverter (optional but helps remove dirt and contaminants from the roof before water enters the barrel).
  3. Filter the Water
    • Place a fine mesh screen at the barrel opening to block debris and insects.
    • Use a secondary inline filter if needed.
  4. Distribute Water to the Chickens
    • Install a spigot near the base of the rain barrel.
    • Attach a food-grade hose or PVC pipe to lead water to a gravity-fed chicken waterer or a system with poultry nipples.
    • Elevate the barrel to ensure good water pressure if using gravity flow.
  5. Overflow Management
    • Connect an overflow hose to divert excess water away from the coop and prevent flooding.
    • Direct overflow into a garden or drainage area.

Keeping the Water Fresh & Safe for Chickens

  • Prevent Algae Growth:
    • Use a dark-colored or covered rain barrel to block sunlight.
    • Add a small amount of food-grade hydrogen peroxide (3% solution) or apple cider vinegar (1 tablespoon per gallon) to deter algae.
  • Prevent Mosquitoes & Debris:
    • Keep all openings covered with fine mesh.
    • Use a floating mosquito dunk (Bacillus thuringiensis israelensis, BTI, safe for animals).
  • Winter Maintenance:
    • If you live in a freezing climate, consider an insulated or heated watering system.
    • Drain the system before freezing temperatures arrive if you’re not using a winter-proof solution.
  • Regular Cleaning:
    • Clean the rain barrel and water lines monthly with diluted vinegar or food-grade hydrogen peroxide.
    • Flush the gutters and first-flush diverter seasonally.

Bonus Ideas

  • Dual Watering System: If you want a backup, set up a manual fill option (a separate water source) in case of drought.
  • Garden Integration: Use overflow water for garden irrigation near the coop.
  • Automated Float Valve: Install a float valve in your chicken waterer to keep water at a consistent level.

This setup ensures your chickens always have access to clean, fresh water with minimal effort! Let me know if you need help tweaking the design for your specific setup. 😊

Michigan Wetland Plants

Western Michigan falls within USDA Hardiness Zones 5a to 6a, which means we have a moderately cool climate with cold winters.

Here are some native wetland plants suitable for our region:

Willow Species (Salix spp.)

Various willow species are well-adapted to wetland conditions.
They provide habitat, stabilize soil, and some have attractive weeping forms.


Pickerelweed (Pontederia cordata)

This perennial plant has attractive spikes of blue-purple flowers and thrives in wetland areas.

Blue Flag Iris (Iris versicolor)

Known for its stunning blue-purple flowers, this iris species is well-suited for wet soils and adds a touch of elegance to wetland areas.

Swamp Milkweed (Asclepias incarnata)

A great choice for attracting butterflies, swamp milkweed produces clusters of pink to mauve flowers and thrives in moist conditions.

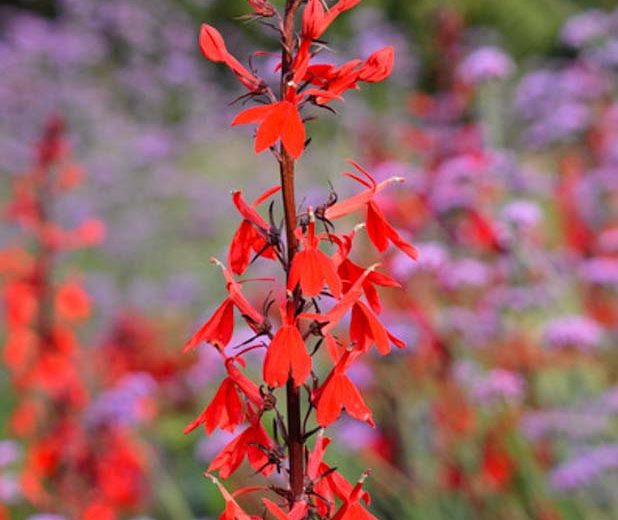
Cardinal Flower (Lobelia cardinalis)

With its striking red flowers, cardinal flower adds a vibrant splash
of color to wetland areas and attracts hummingbirds.

Joe Pye Weed (Eutrochium maculatum)

This tall, native perennial has clusters of pink to purplish flowers and provides nectar for butterflies and other pollinators.

Bluejoint Grass (Calamagrostis canadensis)

A native grass that is well-suited for wetland conditions,
providing habitat and stabilization for the soil.

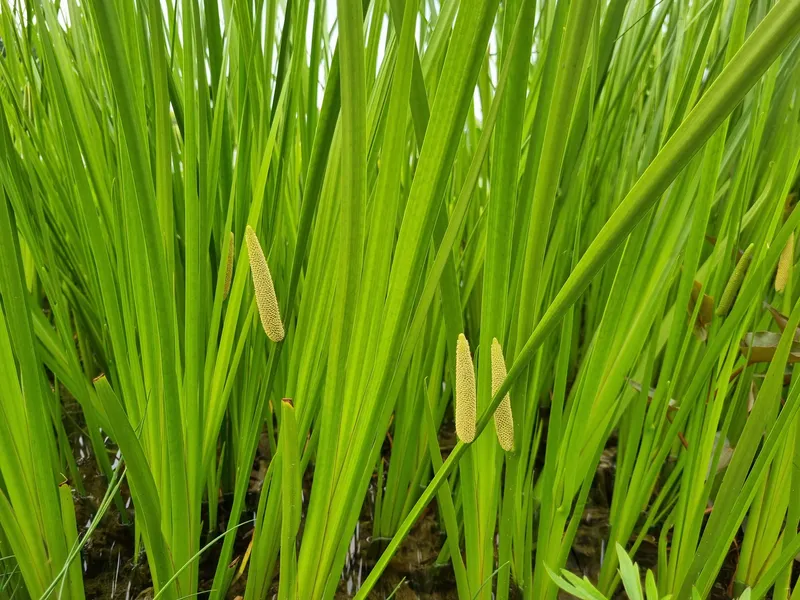
Sweet Flag (Acorus calamus)

This aromatic plant is often found in wetlands and has grass-like foliage.
It can tolerate a variety of wet soil conditions.

Red Twig Dogwood (Cornus sericea)

Besides its attractive red stems, this shrub provides habitat and adds visual interest to wetland areas.

Elderberry (Sambucus canadensis)

A shrub with clusters of white flowers and later dark purple berries,
elderberry is beneficial for wildlife and can tolerate wet soils.

Best Plants for Goldfish Tanks

Plants for goldfish tanks…that they won’t destroy.

Low Light

  • Java Fern
  • Java Moss
  • Anubias
  • Marimo Moss Balls

These are not buried in substrate. Can tether to decorations.

Med – High Light

  • African Onion Plant (Crinum Calamistratum)
  • Water Sprite (Water Spritea Fern)
  • Elodea (Anacharis)

Ensuring a Clean Start: How to Quarantine New Aquarium Plants


Are you excited about adding new aquatic plants to your established tank?

Before diving in, it’s crucial to consider potential threats like pests, diseases, and unwanted chemicals that could accompany those vibrant green additions.

In this post, learn about the importance of quarantining new aquarium plants and provide practical methods to ensure a safe transition into your aquatic haven.


Why Quarantine Plants?

Whether sourced from a local store or received through online orders, aquarium plants may harbor pests, parasites, algae, diseases, or pesticides.

Source: Quora


From harmless snails to harmful planaria and hydra, introducing these unwelcome guests can disrupt the balance of your tank, leading to potential fatalities among your fish and shrimp. Algae, diseases, and lingering pesticides are also silent threats that may take away the focus from your thriving tank.


How to Quarantine Aquarium Plants

Similar to quarantining fish, it’s essential to keep new plants in a separate, fish-free tank for 3-4 weeks before introducing them to the main aquarium. Performing routine water changes during this period is advisable. For those looking to expedite the process to one week, daily water changes and the use of a water conditioner like SL-Aqua Black More Stabilizer can be effective.


Recommended Methods of Sterilizing Aquatic Plants

Before placing plants in the quarantine tank, a thorough sterilization process is recommended. Here are three effective methods:

  1. Bleach Dip:
    • Mix 1 part unscented bleach with 20 parts water.
    • Submerge plants for 90-150 seconds based on plant hardiness.
    • Rinse thoroughly and soak in dechlorinated water for 5-10 minutes.
  2. Hydrogen Peroxide Dip:
    • Mix 3% hydrogen peroxide with water (light or strong mix).
    • Submerge plants for 20 minutes.
    • Rinse and soak in dechlorinated water for 5-10 minutes.
  3. Alum Soak:
    • Mix 1 tablespoon of alum per gallon of water.
    • Soak plants for 3 days.
    • Rinse and soak in dechlorinated water for 5-10 minutes.

Conclusion

Quarantining new aquarium plants is a crucial step in maintaining the health and balance of your tank. By following these sterilization methods, you can enjoy a clean start and ensure the safety of your fish, shrimp, and the overall ecosystem. Whether you’re a seasoned aquarist or a beginner, prioritize the well-being of your aquatic inhabitants for a thriving and beautiful planted tank.